Soy wax for my candles
“A great product to work with. I've been able to make lots of lovely creations with it.”
Sanaa · Soy wax
New: No BS Deo stick, up to 40% off Shop now
Make it yourself with Natural Heroes
Making your own candle starts with the right materials and a clear recipe. Which wax do you need? How do you choose a wick? And when do you add scent? Learn the basics, then choose the candle recipe you want to make.

For your first candle, you can start with one that stays in its jar. You fix the wick in place, melt a suitable candle wax and pour it into the jar. Once it has cooled and cured, you can test the result.
Choose one recipe before you begin. That way you know which combination of wax, wick, jar and any scent you need. Quantities and working temperatures differ from recipe to recipe and from material to material.

Millilitres are not grams. The volume of a jar in millilitres is not the same as the weight of the wax. Always use the amount in grams from your recipe.
With the right supplies you can start well prepared. These are the materials and tools for a candle in a jar.

The base of your candle. Choose a wax that is made for container candles.

The wick has to suit the wax, the diameter of the jar and any additives.
Use a clean, dry, undamaged jar that is made for making and burning candles.
To weigh the wax and any other ingredients accurately.
To keep an eye on the temperature while heating, mixing and pouring.
To heat the wax in a controlled way, for example in a bain-marie if the product instructions say so.
To stir gently and keep the wick centred while you pour and while the candle cools.
For a scented candle. Use a fragrance that the supplier states is suitable for candles.
Check both the ingredients and the tools of the recipe you choose. That way you can see what you already have at home and what you still need.
View the candle recipesSoy wax is a plant-based wax made from soybean oil. Want to make a candle in a jar? Then choose a type that is made for it. A free-standing candle from a mould needs a different formulation. The product information tells you what the wax is intended for.
Use a wick that is recommended for your combination of wax and jar. The size of the jar alone isn't enough: scent and other additives also affect how your candle burns.
Scent gives your candle a character of its own. Only use a fragrance that is suitable for candles and stick to the prescribed amount. The same goes for essential oil. Natural doesn't automatically mean an oil is suitable for every candle.
Weigh out the fragrance according to the recipe. Adding more scent doesn't automatically give a better result. Also follow the stated temperature for mixing. How much scent to add and how to make wax melts is explained in making scented candles and wax melts.

Read the recipe all the way through first. Check that your wax, wick, jar and any fragrance go together. Weigh out the ingredients and set out your tools on a stable work surface.
Start with a small batch. That way you can first get a feel for how the materials behave and how your candle burns.
Fix the wick to the bottom of the jar with a suitable wick sticker or base. Keep it upright with a wick holder.
Before pouring, check that the wick is still in the centre. That stops it ending up against the side of the jar while you work.
Heat the wax according to the product instructions. In a bain-marie, the melting jug sits in a pan of hot water.
Make sure no water gets into the wax, use a thermometer and stay with it. Keep to the recommended working temperature for your wax.
Add the weighed fragrance at the temperature the recipe and product information state. Stir gently and carefully.
Stick to the dosage for this combination of wax and fragrance. Work with the weights from the recipe so you can measure the amounts accurately.
If needed, let the wax cool to the recommended pouring temperature. Pour slowly into the prepared jar and keep the wick straight.
Fill to the level that suits the jar and the recipe. Put the jar somewhere stable where the candle can cool undisturbed.
Wait for the recommended curing time. A candle can feel hard before it is actually ready to use.
Trim the wick to the recommended length before use. Test your first candle under supervision and follow the burning advice for your combination of materials.
The steps give you the overview. Your chosen recipe and the product information give you the exact quantities, temperatures and waiting times.
View the candle recipesStarting from scratch? With the starter kit you get all the basics in one go.
| Item | Candle Making Starter Kit | Put it together yourself |
|---|---|---|
| Wax | 2,500 g soy wax | Soy wax from 100 g |
| Wicks | 10 wicks: wooden (S-shaped and cross-shaped) and cotton | Per type, for example 24 cotton wicks |
| Jars | 3 glass jars: 500, 250 and 120 ml | Your own choice |
| Melting pot | Included | Arrange it yourself |
| Extra | 500 ml coconut oil | Your choice |
| Price | €72.37 | Per product |
From our shop
A different jar size or fragrance can call for a different wick.
Choose a wick recommendation that suits the wax and jar you're using. And test the final combination.
Without weighing, it's hard to judge or repeat your result.
Weigh the fragrance and follow the recipe. That way you can make the same candle again later.
A candle can feel hard before the recommended curing time is over.
Stick to the waiting time for your wax and recipe.
Reviews with photos
“A great product to work with. I've been able to make lots of lovely creations with it.”
Sanaa · Soy wax
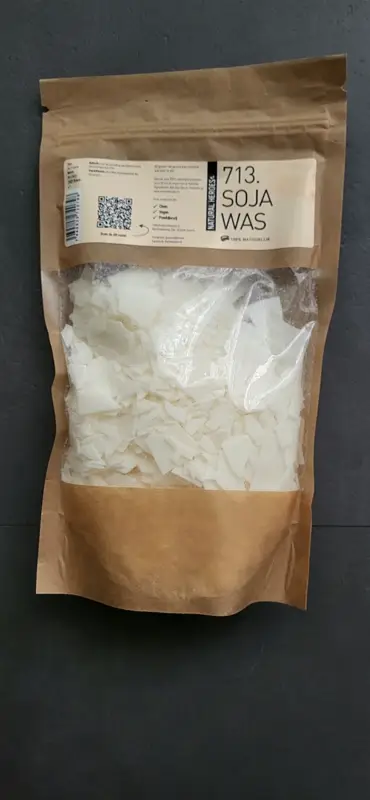
“Good value for money. Fast delivery.”
Daisy · Soy wax · verified buyer
Reviews translated from Dutch.
Recipes
Place your candle on a stable, heat-resistant surface and stay nearby while it burns. Keep it away from flammable objects, children and pets.
Don't add dried flowers, herbs or other flammable decorations to the wax. Follow the advice on wick length and maximum burning time. Put the candle out if it smokes heavily or the flame becomes unsteady or too large.
You can start with one recipe and a small batch. A candle in a suitable jar is a manageable first project. Work accurately, take your time and don't change several ingredients at once on your first attempt.
That depends on your jar and the recipe you choose. Use the amount in grams from the recipe. The volume of a jar in millilitres is not the same as the weight of the wax in grams.
Allow separate time for preparing, making, cooling and curing. The waiting time depends on the wax and the formula you use. Check it before you start, especially if you want to use the candle on a particular day or give it as a gift.
Some essential oils are suitable for candles, others less so. Check the product information and use a recipe that suits that oil. Don't just add perfume, cooking oil or any random fragrance.
The cost depends on the recipe, the jar and what you already have at home. For a first order you may buy whole packs and tools. That's why the amount in your basket differs from the quantity of ingredients you use for one candle. Look at both before you order.
You now know what you need and how the process works. Time to choose your recipe. Browse the Natural Heroes candle recipes and open the one that appeals to you. There you'll find the ingredients, tools and instructions to carry on.
View the candle recipesLook at the recipe first, then decide which materials you still need.
Do you want to stay updated on offers, (giveaway) actions and recommendations? This way you won't miss out on anything! Not too often, we promise.
 You can unsubscribe at any time.